Tutorial: Chase Splitter Instructions and Tips
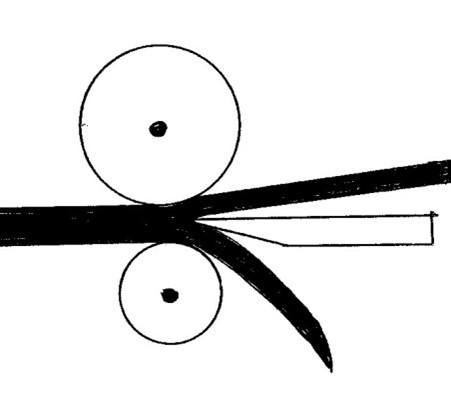
Chase splitters are one of the more forgiving splitter types and have several adjustments. They look different than many other types of splitters, but once they are understood are one of the most reliable styles. There are rollers top and bottom so the leather feeds squarely into the blade
The biggest advantage of these splitters is that the rollers can be adjusted to provide the optimum split. We will deal with adjustments first.
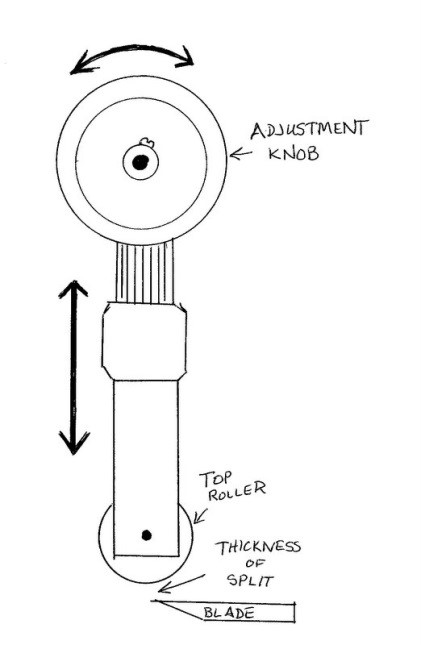
Thickness of the split is adjusted by turning either or both of the adjusting knobs up or down. This raises and lowers the top roller and the distance between the top roller and blade will be the thickness of the leather.
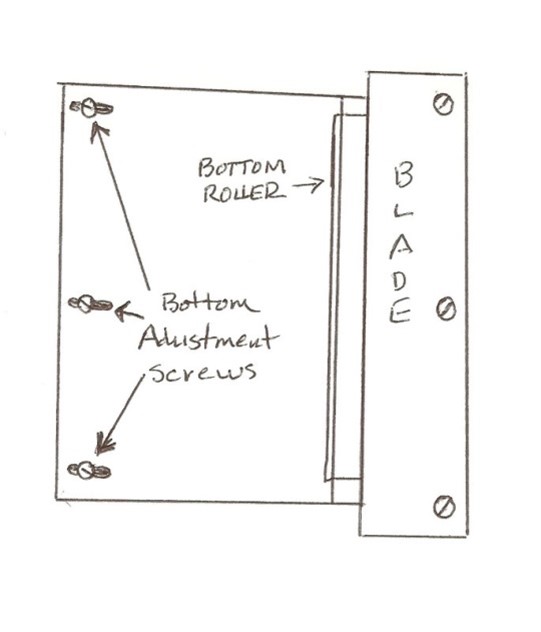
Adjusting the top roller relative to the blade edge is done by turning the two stop screws located beside the back edge of the blade.
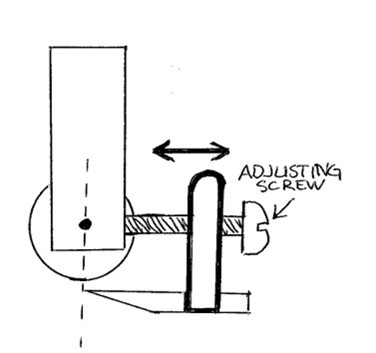
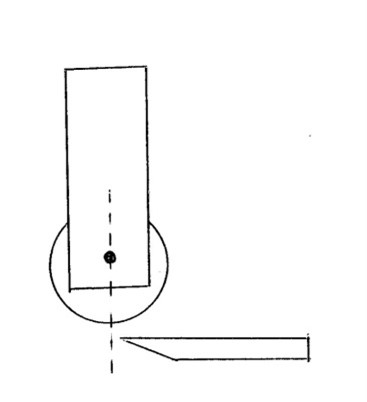
The top roller should be adjusted to be dead center or fractionally in front of the leading edge of the blade edge.
My personal preference is slightly ahead of the blade edge. The latch on the traditional Chase splitters can be adjusted forward and back to hold the roller in position. The Randall design doesn’t require a latch because the spring holds it back against the adjusting screws.
Adjusting the bottom roller – There are two adjustments here. The bottom roller is moved back and forth relative to the blade edge by loosening the screws at the front of the frame.
I like the bottom roller to be dead center or fractionally in front of the leading edge of the blade.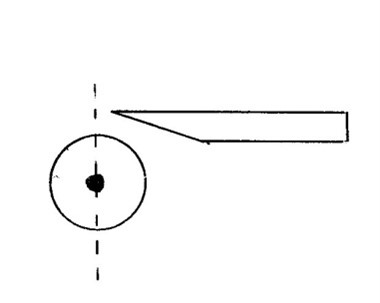
The up and down adjustment is done with the two screws on the side rails of the frame about halfway from back to front.
Screwing them down will drop the roller and have more of a gap between the blade and bottom roller. I set mine with two things in mind – thickness of the leather I am splitting and the amount I want to take off. The plate that holds the lower roller has some flex so there is some leeway, but still it can be optimized with settings. I set my distance between the top and bottom roller to be just about the thickness of the leather I am starting with. Too much distance and there can be some up and down play. Too tight and it works, just a little more effort. I was taught that the rollers “guide the leather into the blade, not smash it”. If you want to split thick leather down to pretty thin, then you can set the bottom roller lower to allow the thicker split to pass below the blade easier without excess pressure from the plate.

In an extreme you could set the gap to 1/8” or a bit more and split a piece of skirting down to 4 or 5 oz in one pass. Most of the time if you are not taking that much off or using thinner leather, so a smaller gap is better as it ‘holds’ the leather between the two rollers.
If you are just leveling something, then little or no gap is better since it compresses and holds the leather between the rollers. The high spots will flex the bottom roller plate down and shave them off.
Maintenance is pretty straightforward. There are oil holes on about every part that moves -top brackets for the adjusting knobs, pivot brackets for the top roller, both ends of the top and bottom roller brackets off the top of my head. I drop some oil between the gears and the slides for the top roller assembly too. Some people grease the gears , I mostly oil. Wipe them down every so often, keep them clean, and they go a long time. Every once in a while I hit the adjustment screws with a drop of oil also.
How often the blade needs to be stropped and sharpened depends on use and type of leather. I strop mine after every time I am done running chrome tan through it. Chrome tan crumbs can corrode a blade pretty fast.
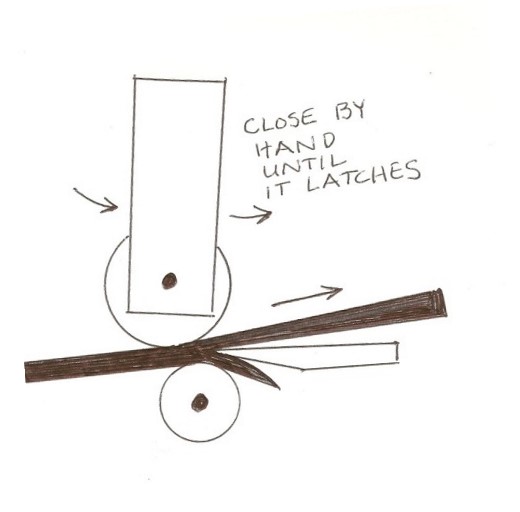
The Traditional Chase vs. Randall “Improved” Chase pattern splitter. The traditional Chase has the spring set so when the top roller is released by the latch it opens with the roller swinging forward and up.
You insert the leather and start to pull the leather through as the top is pulled down against the adjusting screw and the latch catches.
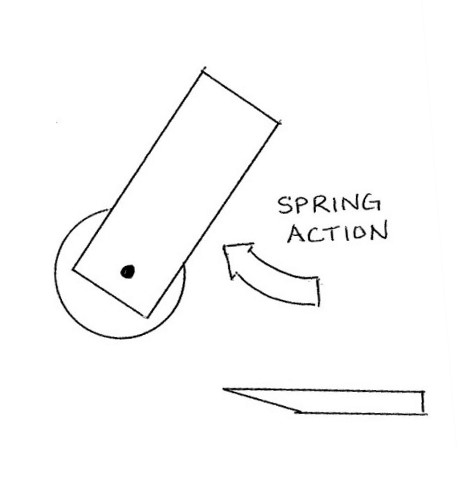
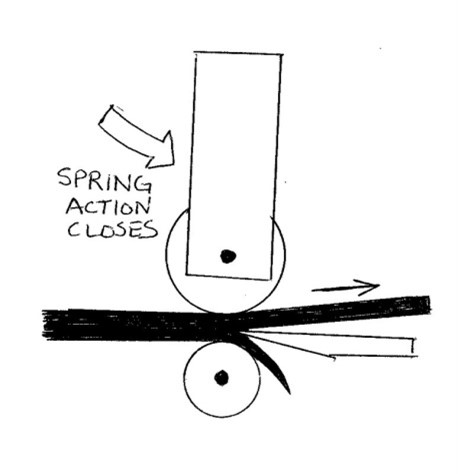
With the Randall the spring action is opposite. It pulls the roller down and holds it against the adjusting screws.
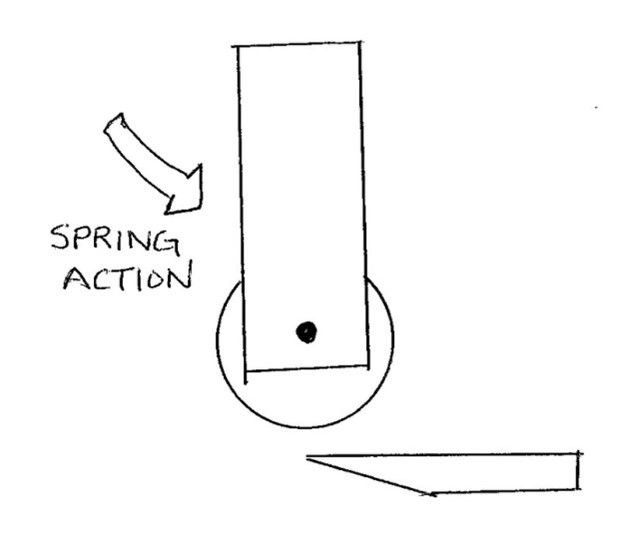
You open the roller, put the leather in and as you pull the strap the spring will pull the top roller down and into position.

Some users prefer one type of action over the other. Actually a traditional Chase can be converted into a Randall style by removing the top brackets for the connecting rod between the handles, remove the top roller assembly and turn it end for end, then replace everything. Call me for details and step by step instructions if you want to convert one.
Using the splitter is pretty straightforward
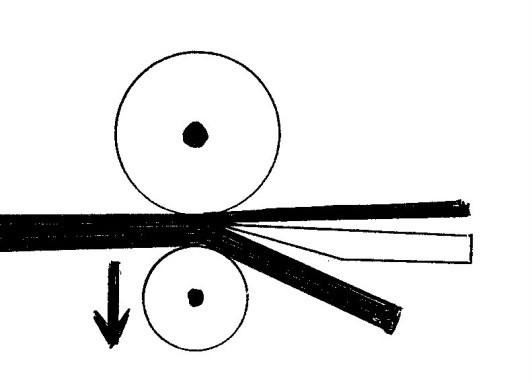
The Chase pattern splitters split with the grain side up instead of down like many other splitters. Set the thickness and insert the leather. It is pretty important with any splitter to let the leather “fade” into the blade. Start to pull the leather and the roller is dropped and the blade will taper into the leather. Once you have reached the end, turn the leather around reinsert it in the already split area and pull to split out the unsplit area you pulled on first. The split off part falls off the bottom. Because of the design, they work better if the direction of pull is slightly higher than the top roller. Do not put the leather in, pull down the top roller, then set the thickness by mashing the leather between the roller and blade.
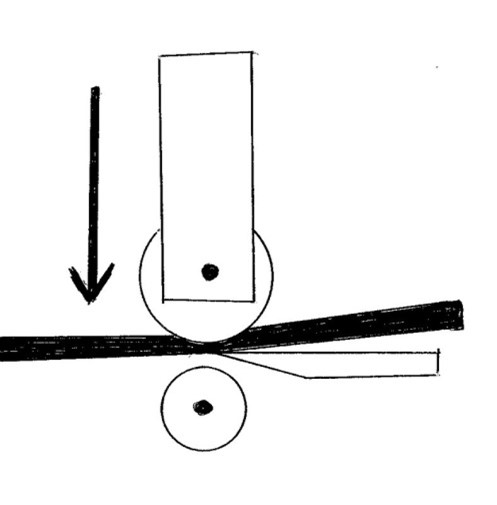
That leather will compress some, but it will also be putting pressure on the blade edge. Set the thickness first and fade the leather in as the top roller is brought into pressure.
Troubleshooting the top roller vs. blade relationship is easy with these splitters. With most other splitters you need to shim the blade if it is not parallel with the roller. On a Chase pattern you can actually fix it. Loosen the set screw on one of the adjusting knobs. Slide the knob over to get the teeth past the gear. While eyeballing the gap, turn the gear one way or the other until the roller and blade are parallel. Slide the knob back into the gear and tighten the set screw. Simple Simon fix but call on me if you need help.
Safety – With the blade edge up between the two rollers, the Chase is one of the safest splitters there are. Still they have a sharp edge and require some diligence. The worst cut I got was on a Chase. I had just sharpened a blade I was replacing and concentrating on lining up the screw holes. I brushed finger over the edge of the blade and neatly removed a dime sized piece of skin. Take away there was to watch all your fingers. Another story I have heard was someone sticking their finger into a Randall. The top roller came down by the spring action and the person panicked and pulled back. They aren’t scary, just bear watching.