Tutorial: Using Rein Rounders
Rein rounders are used to make a rounded cross section profile in leather. Some common applications are handles, dog collars and leashes, horse tack, and leather belting for machinery. The rounders themselves may be either bench mount to be screwed to the benchtop or vise mount to be held in a vise. There are several makers who then made several styles of rounders, and to further add to the possibilities – any number of progressively sized holes from 5 through 22 holes.
Selecting, Sizing, And Preparing The Leather
Rounds can be from vegtan leather, harness leather, or latigo. The final size of the round needed will determine the appropriate thickness of the leather to select. The leather will be compressed in the rounder so a thickness is needed larger than the finished size. I generally select a leather so the thickness will be about 1-2 ounces more than the size of the final round (1 oz = 1/64”). More compressible leather to the thicker side and denser leather pretty close to final thickness.
The leather needs to be prepared once selected.
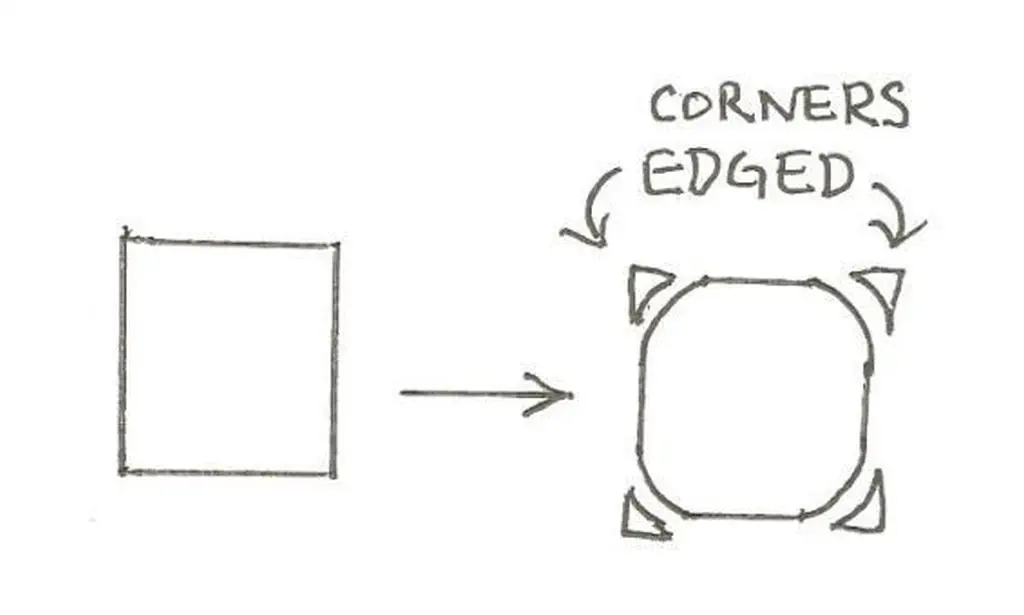
Single ply thicker leather may be used for smaller rounds and belting. The leather is cut to the width needed and has a square cross section. The four edge corners are rounded over with an appropriate edge beveling tool that leaves a rounded profile.
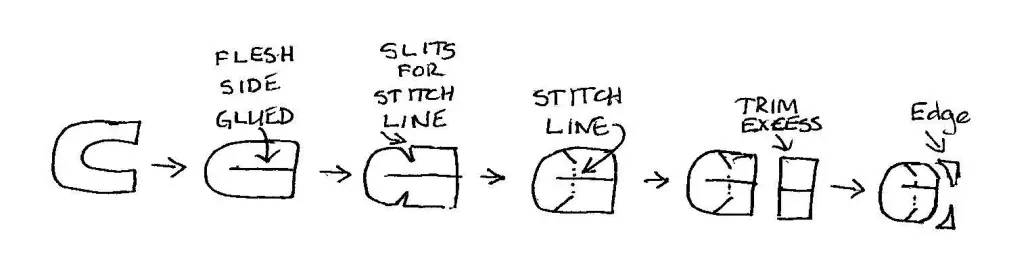
Single piece folded leather may be used for medium sized rounds. The leather is cemented on the flesh side and folded lengthwise on itself for the length of the needed round section. The fold and glue can be set by tapping with a smooth faced hammer. The round section will need to be sewn to hold it. Ideally the best technique is to sew in an angled channel. Some use a vertical channel as well with good results. Most handew but a few machines are capable of sewing round consistently. The stitches don’t necessarily need to be fine since they will be covered anyway. I was taught to handsew them at 4 SPI. The channel may then be glued with a light coat in cement. The excess width is cut off, and the two square corners are edged off with an appropriate sized edge beveler.
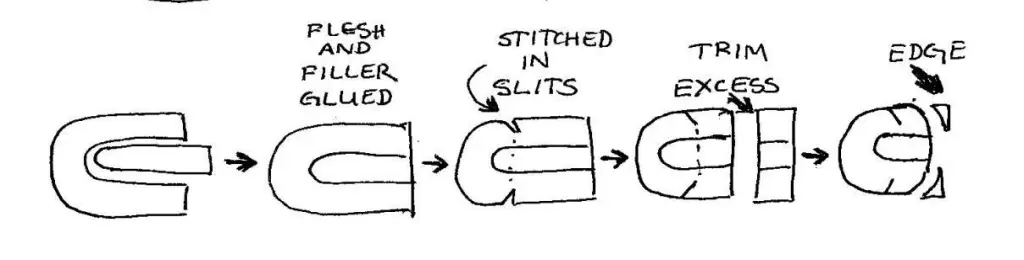
Doubled and filled leather is used on heavier rounds. The filler piece is edge beveled top and bottom on one edge. Cement is applied to the top and bottom of the filler and flesh side of the outer piece. The filler is centered on the outer piece. The outer piece is folded up and cemented to the filler. Then it is treated as the single piece folded round. Again - tap to set the fold and cement, sew the round, trim excess, and edge the two square corners.
Once the leather has been given the approximate rounded shape by edging it needs to be prepared to go to the rounder. The leather will need to be able to compress in the rounder and hold its profile once it dries. Here is how I was taught. The leather needs to be made moldable by “casing” it as it would for tooling or stamping. Obviously the latigo and harness leather are going to have some oils and waxes that will prevent some of the casing but still can be done. I was taught to use warm water for the latigo and harness leather with a surfactant like Dawn dish detergent. I use the same for veg tan leather as well. The section is wet, and the moisture is allowed to penetrate to depth throughout the leather. It may take a several minutes to a few hours. It may need to bagged to prevent surface evaporation or allowed to air if saturated. A little trial and error will give you the experience to judge to correct moisture level to progress to the rounder.
Using The Rounder
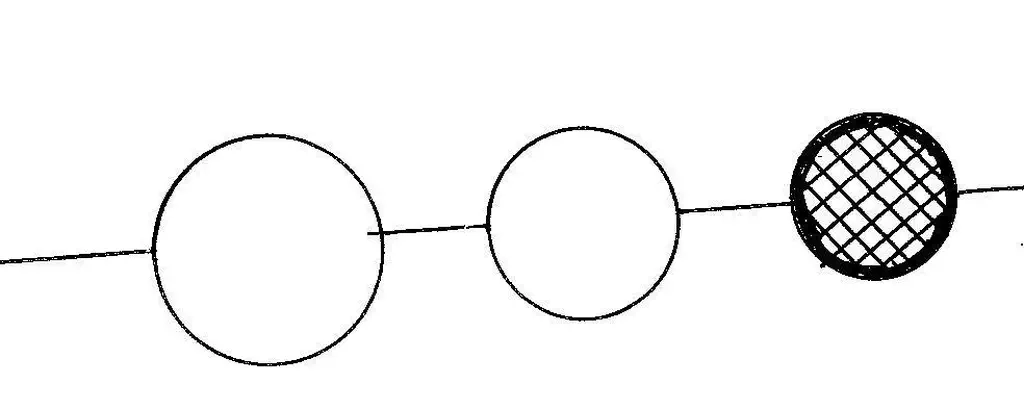
The rounder is opened and the leather is placed in a larger hole than the finished size required and the rounder is closed.
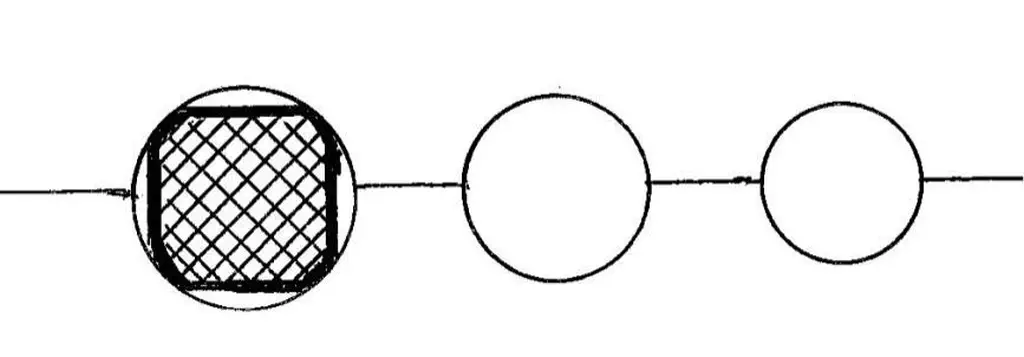
The leather is worked back and forth to start to establish a more rounded cross section.
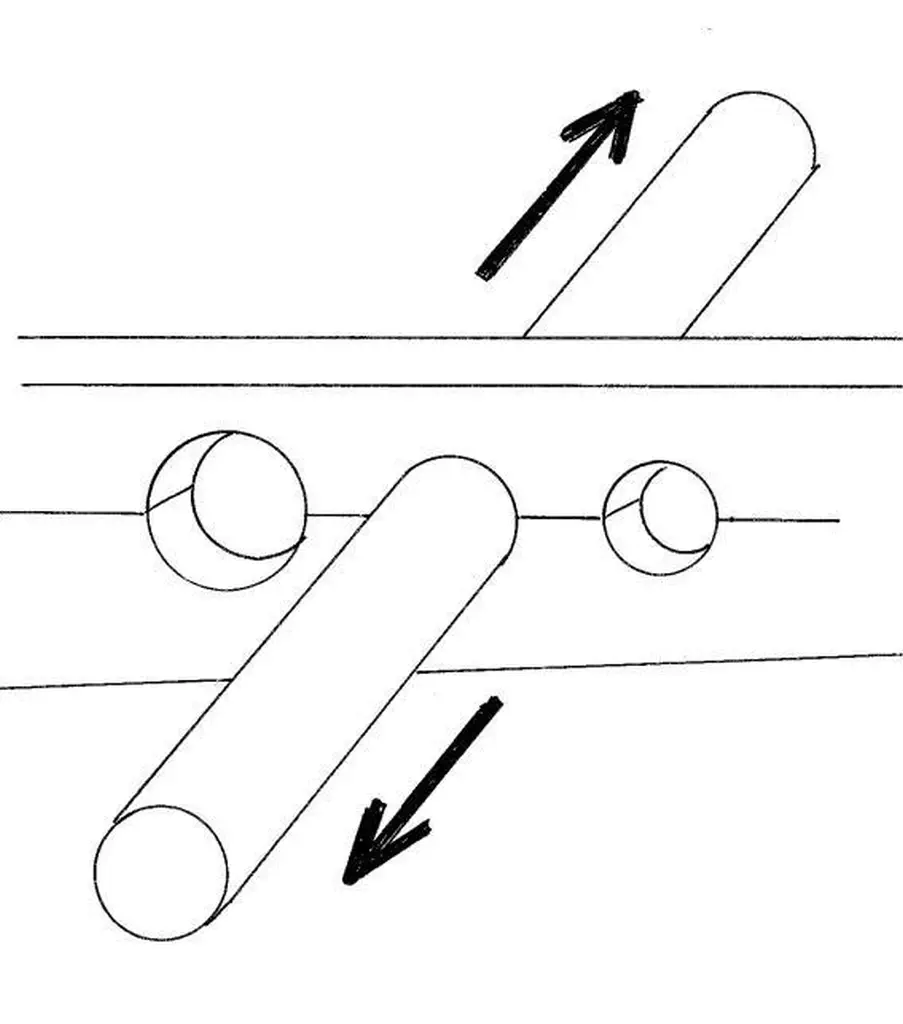
The rounder is opened, the leather is placed into the next stepped down hole, and similarly worked.
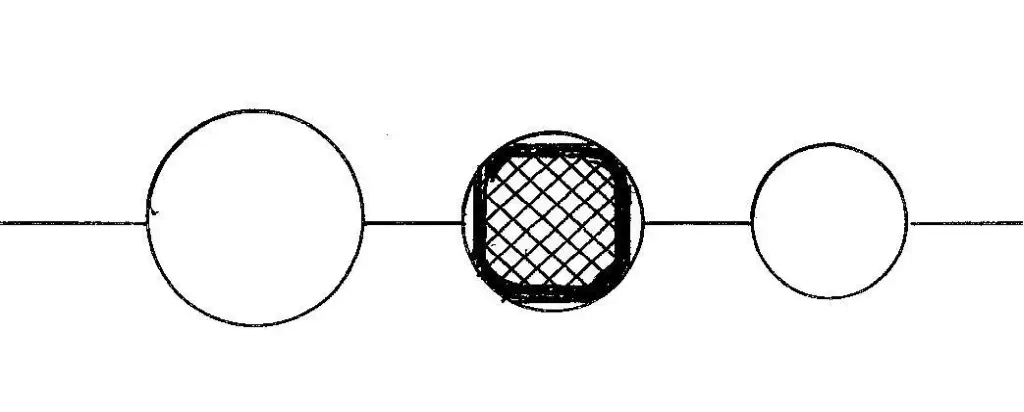
By the time you get to the finished sized, the leather should be compressing uniformly and have a totally round cross section and smooth surface.
There a few things to be aware of using the rounder.
-
If the leather surface is too dry, then there can be some “glazing” or surface burnishing. If the leather is too dry and worked too fast, the grain can heat and glaze, making it more prone to surface cracking . A light spritzing with a water bottle will help prevent that. One guy who taught me spritzed the leather, then just before he went the rounder did a wipe with a white saddle soaped rag to lubricate the surface. Some people don’t like the soap, so that is something that a little experimenting will help you determine which is better for your needs.
Slipping the Grain and Wrinkles
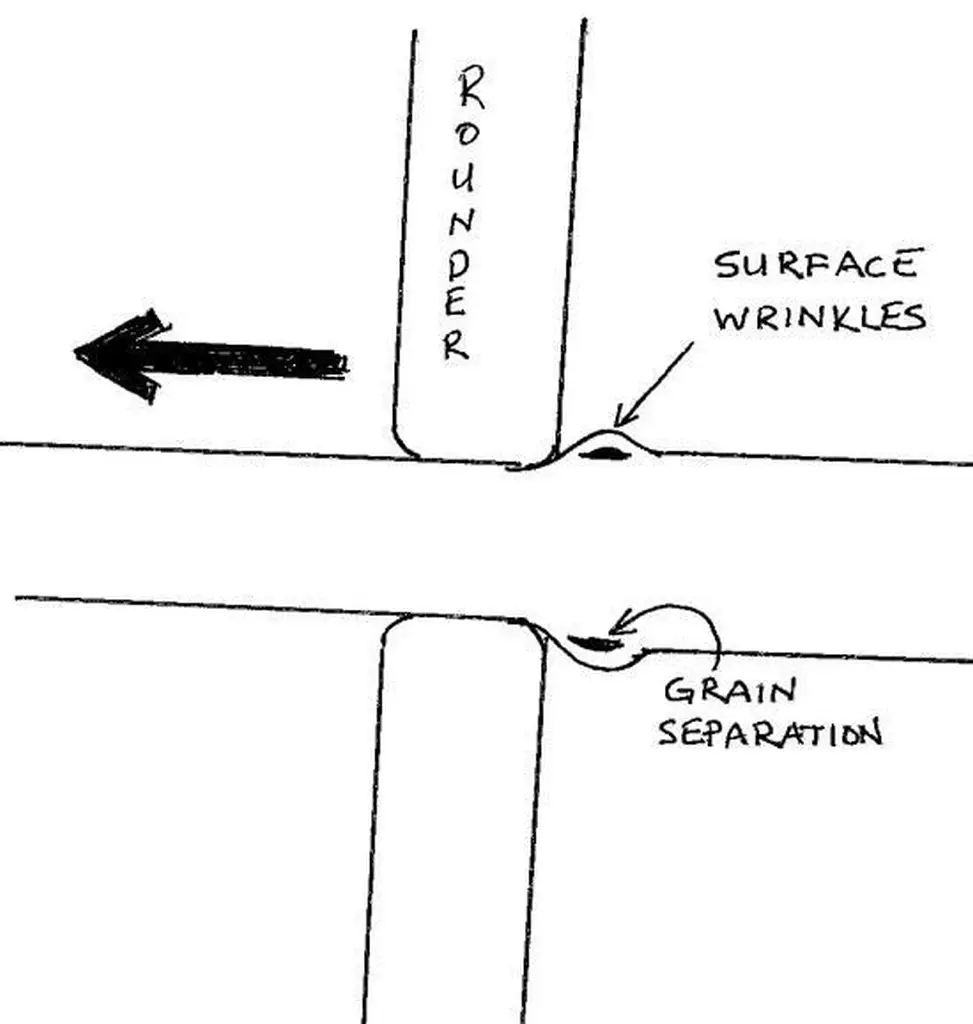
- It is tempting to start in a smaller hole and “force” the leather back and forth. With some leather this can result in separating the grain of the leather. This may also be referred to as “slipping the grain”. This is bad juju. Again, start big and progressively step down.
- The grain may also be slipped by working leather too dry or the surface may be wet but the layers just under will be too dry. In these cases the surface can pull away from the deep layer. Even moisture throughout the leather is your friend.
- Softer leather will be more prone to slipping the grain or pushing a wrinkle into the grain. They also tend to be a little stretchier. Selecting a reasonably firm leather will prevent that. On the other extreme, dense leather will not compress as easily and be hard to compress. Some vegtan leather that has been rolled for strap sides will be harder to compress, but if profiled well before going to the rounder will make a nice firm round.