Tutorial: Using A Draw Gauge
Draw gauges are used to cut straps and have been in US production close to 200 years. This tutorial outlines some of the things I check on draw gauges to set them, a few tips for use, and some safety tips as well. These have an exposed blade and will require respect, attention, and care. This tutorial is sure not all inclusive and learning first hand from someone adept at using one will help you immensely.
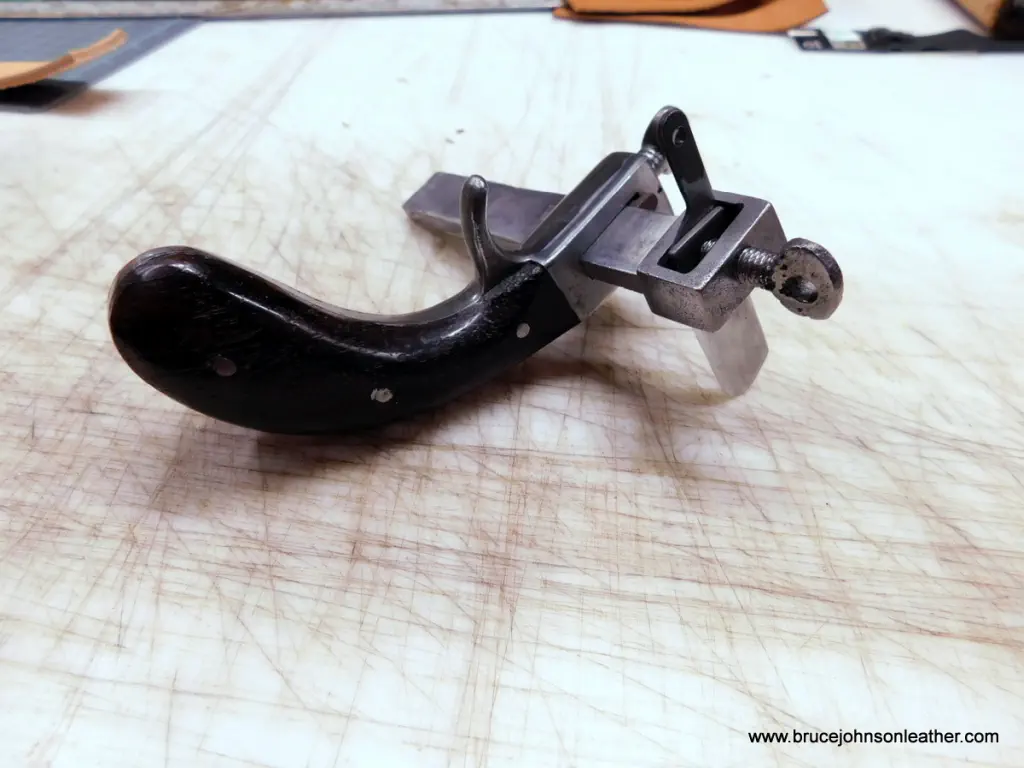
Choosing a Draw Gauge
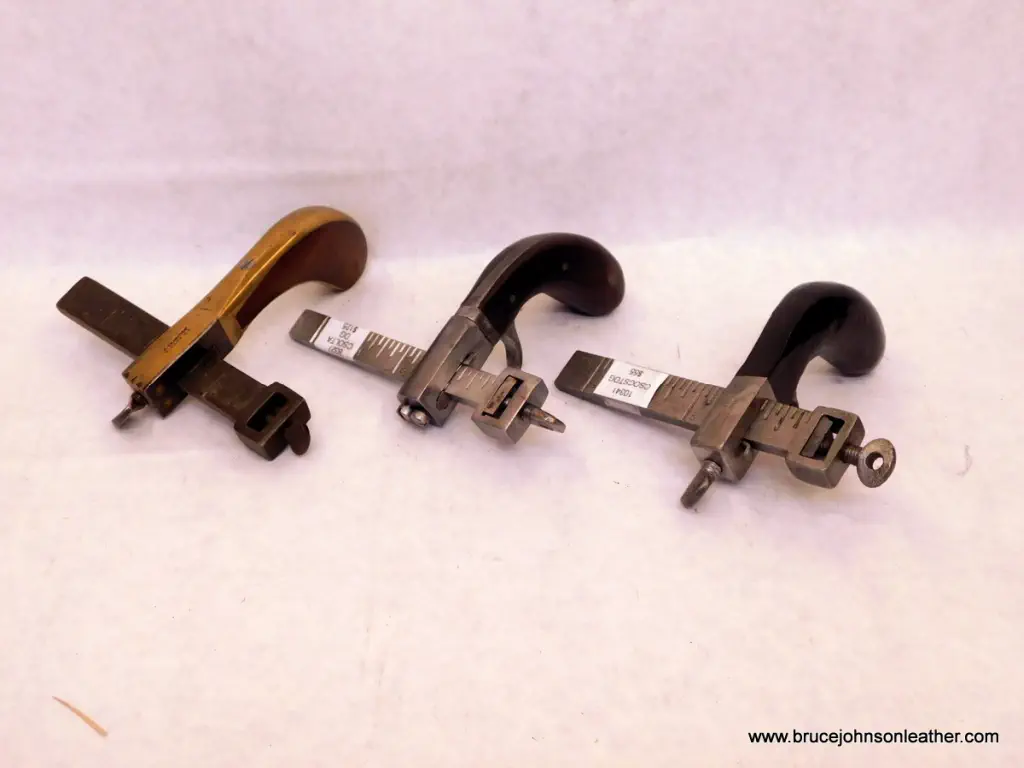
There are several choices for draw gauges - new or old. Let’s consider new – CS Osborne cast metal or an import? Looking at old – cast metal handle, wood scale handles, brass frame with rosewood inserts? Basically if they are made correctly and square with a sharp blade, then they ALL should work the same. The handle size can vary between makers and era and some may feel better than others to you. It comes down to what you want to see hanging on your wall.
Setting up
Check for bar and handle relationship. They should be right at 90 degrees to each other. The slot for the blade should be parallel with the guide side of the handle. If the blade and guide are more open on the cutting edge aspect then the strap will tend to feed in wider and bind as the cut is made. If the blade “toes in” then the strap will narrow as you cut.
Front gib/shim – is used to protect the bar from marking and damage from the set screw in front of the handle. A few may have a second one that sits behind the bar as well. That one may be used to square up a bar and handle, and swapping it end for end may make a difference.
Blade gib/shim – is used to protect the blade from the set screw. I prefer to have my blades tip forward slightly into the cut, and the pressure from the gib helps to hold it steady. The blade angling forward will tend to make a slicing action and help keep the leather down as you pull.
Blade Sharpening
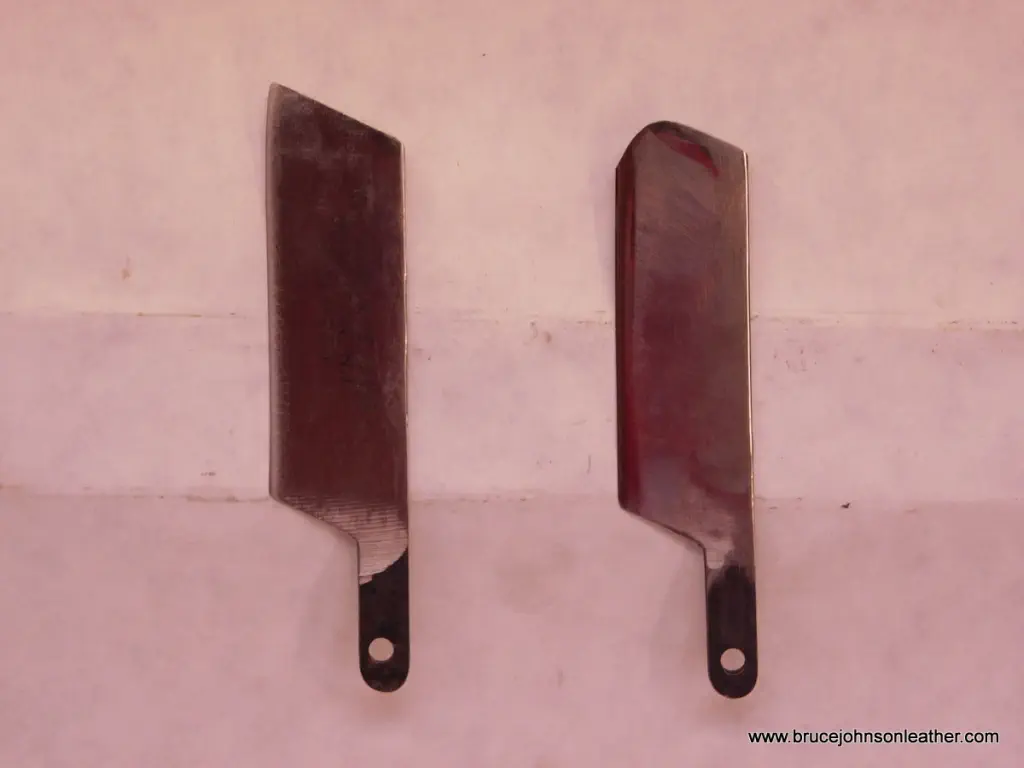
Blade sharpening is not an optional skill for draw gauges. The blades for draw gauges need to be sharp and maintained. The stock blades normally do not come sharp enough for adequate use. Many times they need to be worked down to a flatter bevel and sharpened. There are a few knife makers who make premium quality blades for draw gauges and in most cases they will be sharp and ready to go immediately. I work my blades a bit more on the side that will be facing the handle. By doing this the slight amount of opening on that side will help to “draw” the leather in and hold it against the handle easier. I shoot for about to have about 2/3 of the bevel to the inside and 1/3 of the bevel to the outside. Depending on use, the blades will need to be taken off and stropped routinely and sharpened as necessary.
The new stock blades come with a sharp pointed tip on the end. In my case, I round that tip off and the blades I supply will be rounded off. That tip is far enough up that it will not be used to cut leather, but just right to cut the user. It took me a while getting in several 80-180 year old draw gauges with rounded blades to figure that out. I have to suspect that rounding off the upper blade tip was a safety thing.
Setting the width
Yes, there is a scale with the measurements and most are pretty accurate, but then again some aren’t. You can double check to make sure before trusting it. Some may be off a slight amount on the scale and you can mentally factor that in or go to Option #2. I made a set of “master straps” from firm leather. I cut straps to my common standard widths and marked them. I punched a hole on the end and laced them in a loop to hang up. When I need a 1” strap I set the 1” master in, slide the bar over so the blade is firmly against the master width and tighten the position. I don’t even look at the scales. I do that for all my strap cutters – draw gauges or plough gauges. It is just faster and more repeatable for me. I use a saddle spike in the set screws to work them, and another safety tip – be aware of the blade when you are tightening or loosening either screw.
Gripping The Draw Gauge
The draw gauge needs to be held firmly and the thumb is used to hold the leather down to the bar. I struggled with my grip a bit early on until an experienced worker showed me.
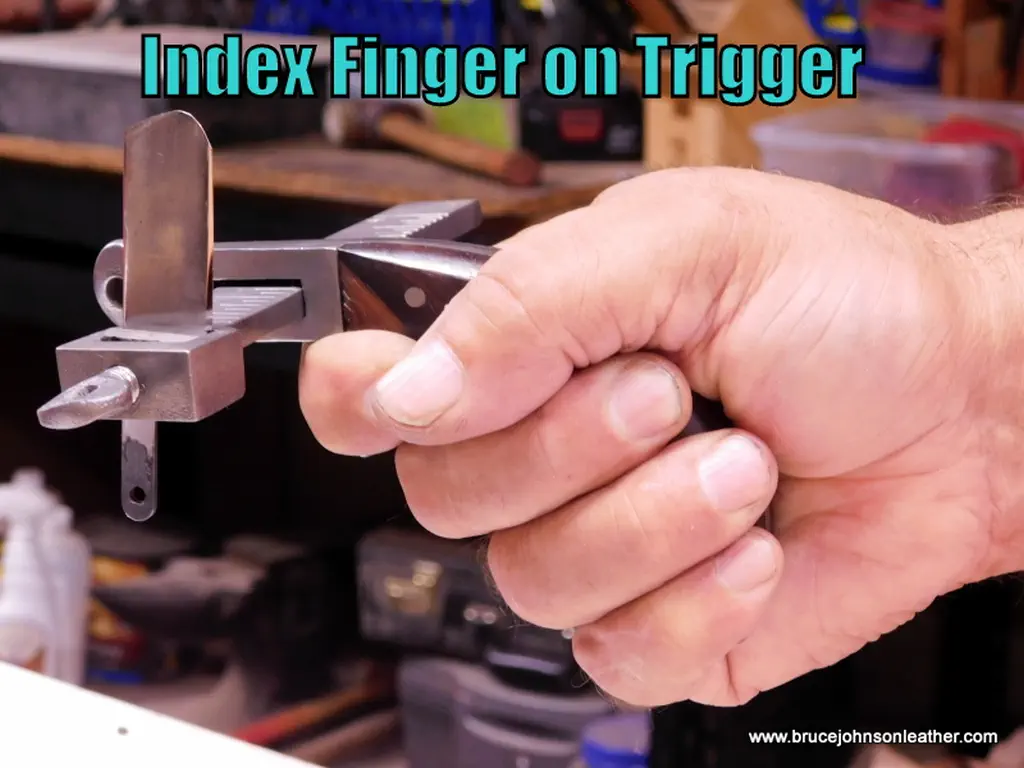
I was using my index finger on the trigger and really having to reach forward with my thumb. I was fighting to keep my wrist straight and had some poor cuts at times.
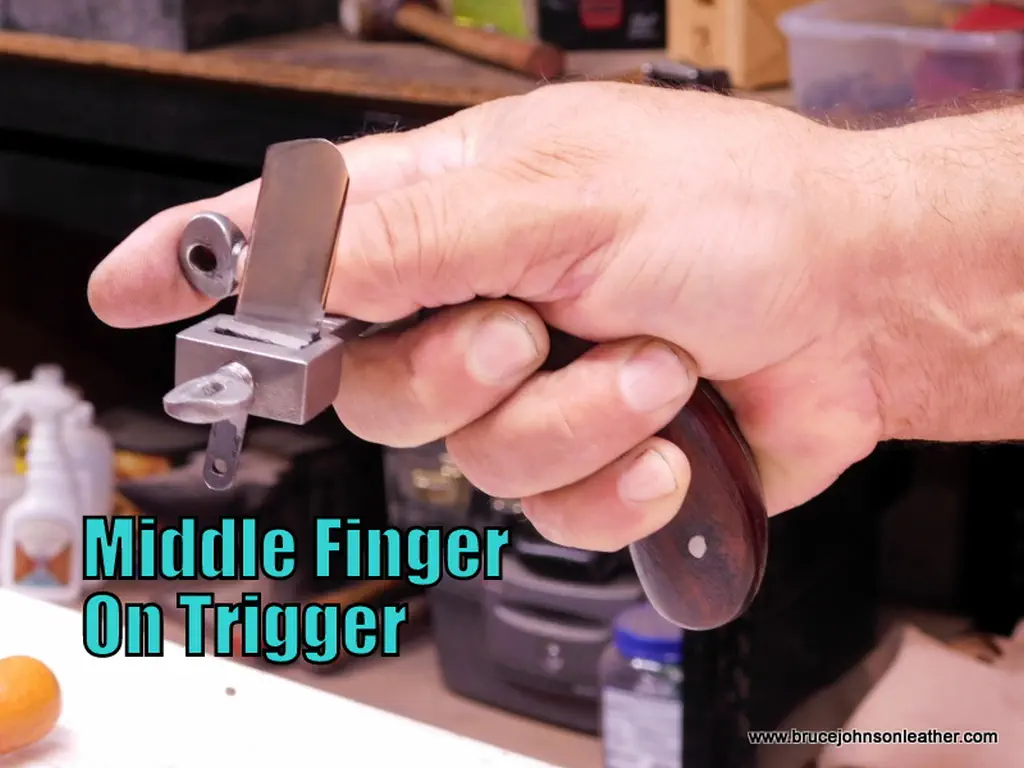
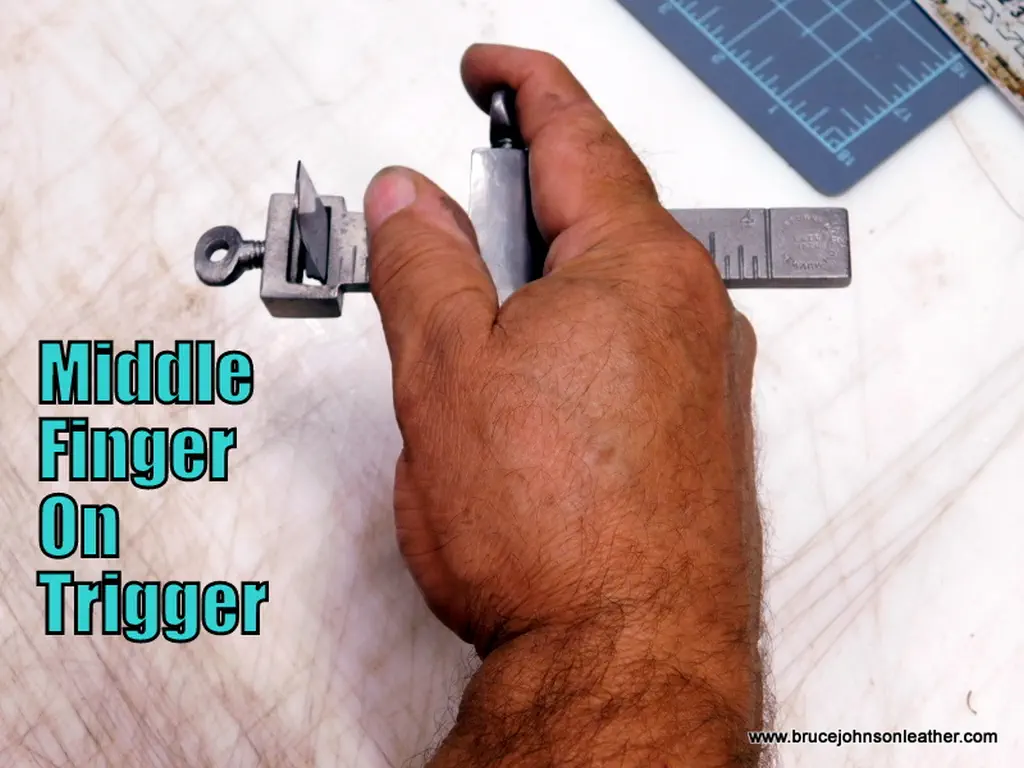
I now wrap my middle finger around the trigger and my index finger will automatically lay up next to the right ride of the handle on top of the bar. Your index finger will want to wrap around the front and actually put counter pressure against the front screw to counteract the torque of the blade. This grip also puts my thumb in a more forward comfortable position to hold the leather down. It also almost locks my wrist and my straps are much better. I have much more control with this grip. Please try it!
Starting The Cut
This can be a bit tricky. The leather needs to be off the edge of the bench or lifted up to allow for the handle under it. The blade needs to be pulled into the leather to start the cut. Never push the leather into the blade with your left hand. You can already see this scenario coming. The blade pops into the leather and your left index finger hits the blade. It happens more with dull blades, and I tell myself that the time out spent resharpening the blade is usually shorter than the wait at the emergency room. I usually start from the bottom of the leather edge with my gauge tipped away slightly and roll it up into the leather. If the leather is particularly firm you may need to make a starter nick with a knife in the edge of the leather. Once you get the cut going then it is time to pull a strap.
Pulling The Strap

The strap being cut needs to be tensioned and there is no need to tension the piece you are cutting it from. Most people tension the strap with their left hand. You reach over, get a hold with the left hand and pull the gauge with the right hand. Once you get stretched out, get a new grip and continue until the strap is cut. The caution here is reaching over with that left hand and the blade sticking up on the draw gauge. This is where the rounded blade tip is a good idea. Another way to tension the strap is to use a clamp of some type. There is a dedicated clamp called a “third hand” or “bench dog” that binds the leather with a cam action, woodworking bench “hold-down”, or a small vise even. One of my problems was that even with everything set up right and a good start, I would get a wandering cut at times. My old mentor told me to stop watching the blade cutting the leather and just watch the leather staying up next the handle. The action is where the blade is and tends to draw your eye. If I keep the leather up next to the handle, that blade will do just fine by itself without me watching it. I have since transferred that advice to plough gauges and table saws. If I watch the board edge stay on the fence, that table saw blade 4 inches over and fixed in position just keeps cutting right where it supposed to without my watchful eye.
Bench Tips
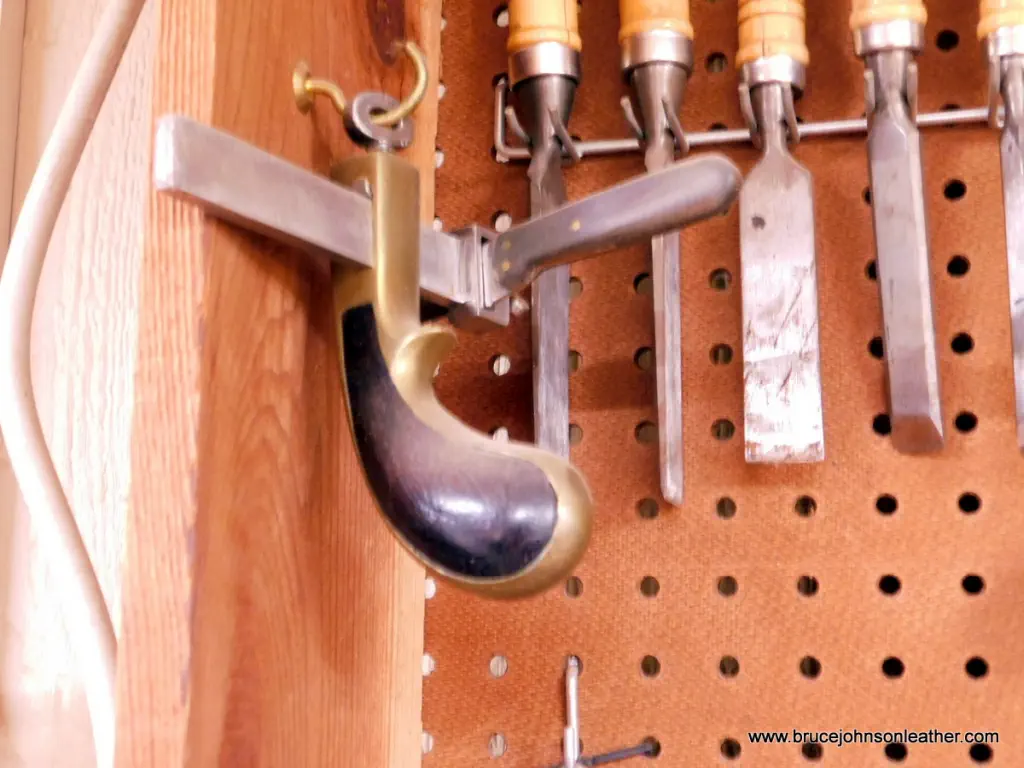
I normally hang my draw gauge up after use. If I do set it on the bench then I set it with the blade down – period and every time. Inadvertently reaching across an upturned draw gauge is bad juju. When I hang my draw gauges up it is with the blade facing the wall. I mostly hang them from an opened cup hook with the front setscrew.