Leather Tool Selection
This page lists topics and my opinions on selecting leather tools. It may be navigating through older vintage tools and identification, sizing, and purposes. I also will have sections on newer tools as well.
Edge creasers are one of the vintage tools that are used to firm the edge of a piece of leather as well as make a decorative line parallel to the edge. One of the common questions I get is selecting a size for single-line edge creasers. The vintage Gomph and Osborne tools are sized from #1 through #5 with the occasional #6 thrown in to confusion everything. The size numbers generally equate to 1/32 inch of width per size number. So following that system, a #1 leaves a 1/32 inch bead along the border. This is very fine and would be appropriate on the
thinnest of leathers such as a wallet interior. Following this up, a #5 is 5/32 inch and would leave a bead line of just over 1/8 inch.
Then to further confuse things there is a larger size range – CS Osborne and HF Osborne called theirs a “layer creaser” and Gomph called their larger size range a “large round creaser”. These stepped up in size again by 1/32” on average starting with the #1 being 6/32 of an inch through the #5 at 10/32 inch or 5/16 inch.
So the bottom line leads to “What sizes do I need?Do I need a full set?” In many cases that answer is no. I suggest starting out with a few creasers in every other size number. Realistically,
1/32 inch is not a big size difference but 1/16 inch is. If you do mostly thinner leather projects then a #2, #4, and a #1 layer or large round creaser should be adequate. If you are doing thicker projects then maybe go with a #4 single-line creaser along with a #1 and #3 layer or large round creaser. You can add larger or smaller sizes on either end or in between as you grow your needs.
One of the more common stamp questions I get is the confusion with Ray Hackbarth stamps. Ray Hackbarth was a leather stamp and swivel knife maker in Phoenix Arizona. Ellis Barnes had made stamps in Southern California for several years and at some point purchased the rights to use the Ray Hackbarth name and moved to Arizona. The confusion comes in with Ellis Barnes marking some of the stamps with “R Hackbarth Phoenix Ariz Stainless” just like the original Ray Hackbarth stamps.
There are a few ways to differentiate the original Ray Hackbarth stamps from the Ellis Barnes made “Ray Hackbarth stamps”. I’ll go through the points that I look for to determine who made a particular “R Hackbarth” stamp.
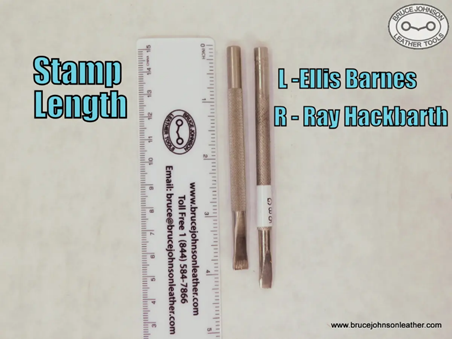
Length - the first of these is stamp length. The original Ray Hackbarth stamps are 4-1/8 inch or slightly longer. Ellis Barnes was famous for using a shorter stamp length and his were mostly 3-7/8 inch but to confuse things he sometimes used longer stamp blanks. I have also had some mixed sets of original Ray Hackbarth and Ellis Barnes made ”Ray Hackbarth stamps” that were all the same length. The owner had cut down the original Ray Hackbarth’s to be the same length as the Ellis made Ray Hackbarth’s, probably for consistency in use. Not very often but I have had a few “aha moments” when I found a definite Ray Hackbarth stamp that had been shortened.
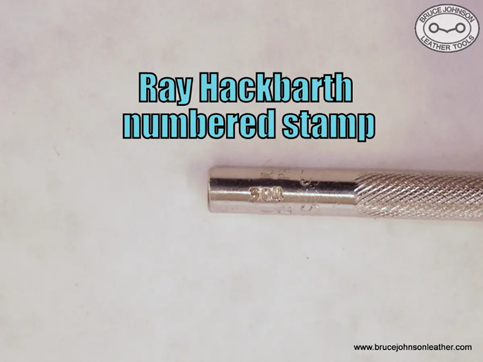
Stamp Numbers – this is an easy one. If there is a number on the shank of the stamp that was Ray Hackbarth. He was by some accounts one of the first to do mail order good quality stamps and needed a way to identify particular stamps in a brochure for the customer. Some people say the Ray Hackbarth stamps without numbers were earlier than the numbered stamps. Others say that he still did some he didn’t number later on, and those were mostly sold to a local trade. Ellis’ stamps were not number marked.
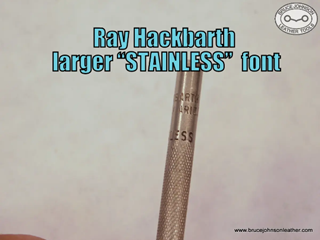
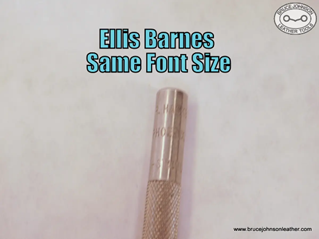
Font Size – Ray Hackbarth used one size font for the “R Hackbarth Phoenix Ariz” and a larger font for the word “Stainless”. Ellis Barnes used the same size font for all three lines. Often times the word “stainless” on the original Ray Hackbarth stamps was struck in lighter than the rest of the marking, but not always. The Ellis Barnes markings tended to be consistent depth top to bottom.
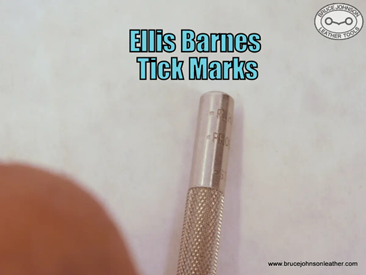
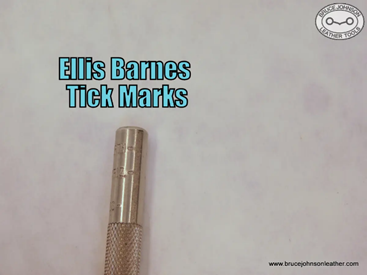
Tick Marks – Ellis Barnes had small dots or tick marks at the beginning and end of each line of font. Ray Hackbarth did not have any marks.
I hope this has been somewhat helpful to clear up confusion on these stamps.
- Bruce
Choosing Between Rotary and Single Tube punches
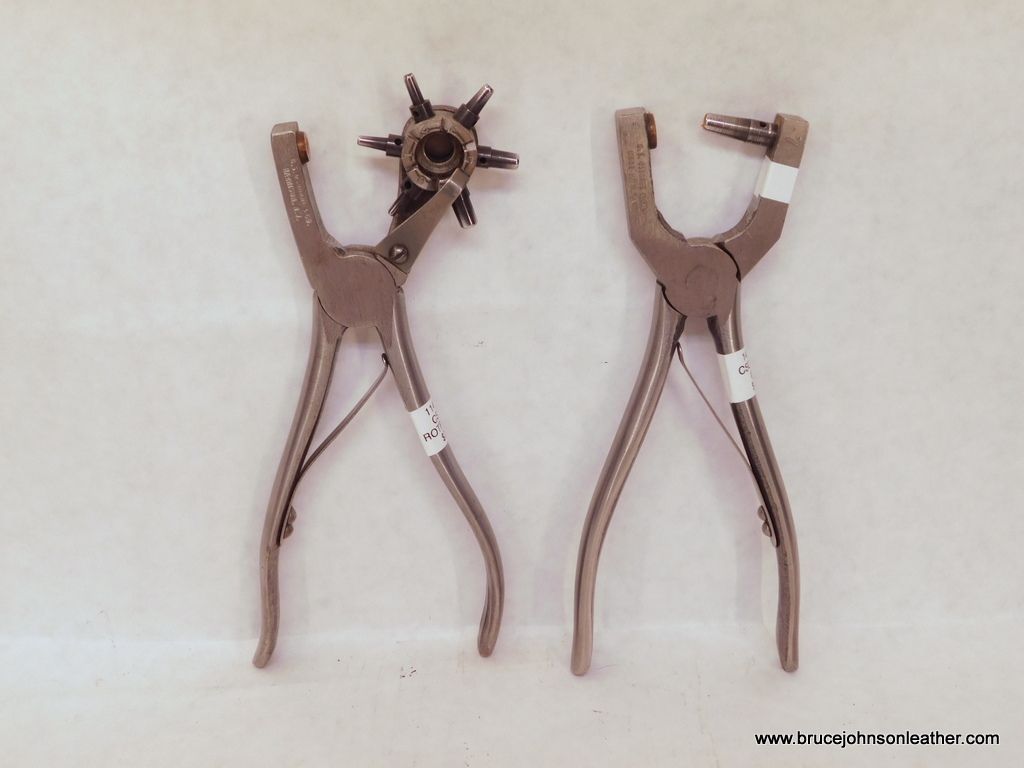
Pliers-Type Punch Comparison
One of the common questions I get is “Please tell me the differences between the rotary punches and single tube punches”. They each have advantages and disadvantages.
First off rotary punches are made by several manufacturers in a lot of quality and price points. The economy punches are usually made with a stamped metal frame and the tubes are pressed in. The tubes normally do not come using-sharp and it can be difficult to sharpen them. If a tube is damaged, it is hard to get the tube out and find a replacement tube. Think “inexpensive and disposable”. If you are serious about your leather – these are not the best choice. The solid frame rotary punches have the tubes screwed in. The frames are more sturdy, and tubes are more easily removed to sharpen or replace if damaged. They normally come with six tubes installed.
Single tube punches are a solid frame punch that holds a single size tube. In the case of CS Osborne the #00 through #7 have the same thread and can be interchangeable. The #8 has it’s own threading. The #9 and #10 use the same thread and can be interchanged.
The question comes down to “Which type is better for me?”. The rotary punches are more versatile with 6 sizes of tubes on the same punch. The disadvantage is the rotary punch tubes are shorter with a larger taper angle. That taper can be a factor on thicker leather. The single tube punches have a lower taper and go through thicker leather easier. They have the disadvantage of one size per frame. Although they can be interchanged between some sizes, that is not a quick process, tubes aren’t size marked and get confused. Most of those that try it give up on that plan pretty quick.
The answer is to buy according to your needs.
- If you need something to go in the tack compartment of the trailer or your travel leather tool box – rotary punch and maybe a larger size single tube punch or two depending on your needs. I have seen some saddle makers do this too. The common for rodeo rigs, packers, and horse trainer tool kits is a rotary punch and then a #8 and #10 single tube punch.
- There are shops that have the whole range of sizes of single tube punches. They are ready for about any size hole they need. I would say most of the shops I have visited have the set.
- Some makers buy every other size number to start out – not a bad plan and especially to stock a new shop. If you find you need in-betweens later on, then you can buy to your specific needs.
I hope this helps to clarify the choices in these punches and makes a more informed buying plan for you.
Thank you!
Bruce